Creating Earrings

(the method I used to create the monstera earrings)

Tools & materials used

1mm sterling silver sheet, size 4 & 6 saw blades, 0.5 drill bit, pilar drill, doming punches, hammer, 1mm sterling silver round wire, 2mm masonry nail, hard solder, rouge paste.

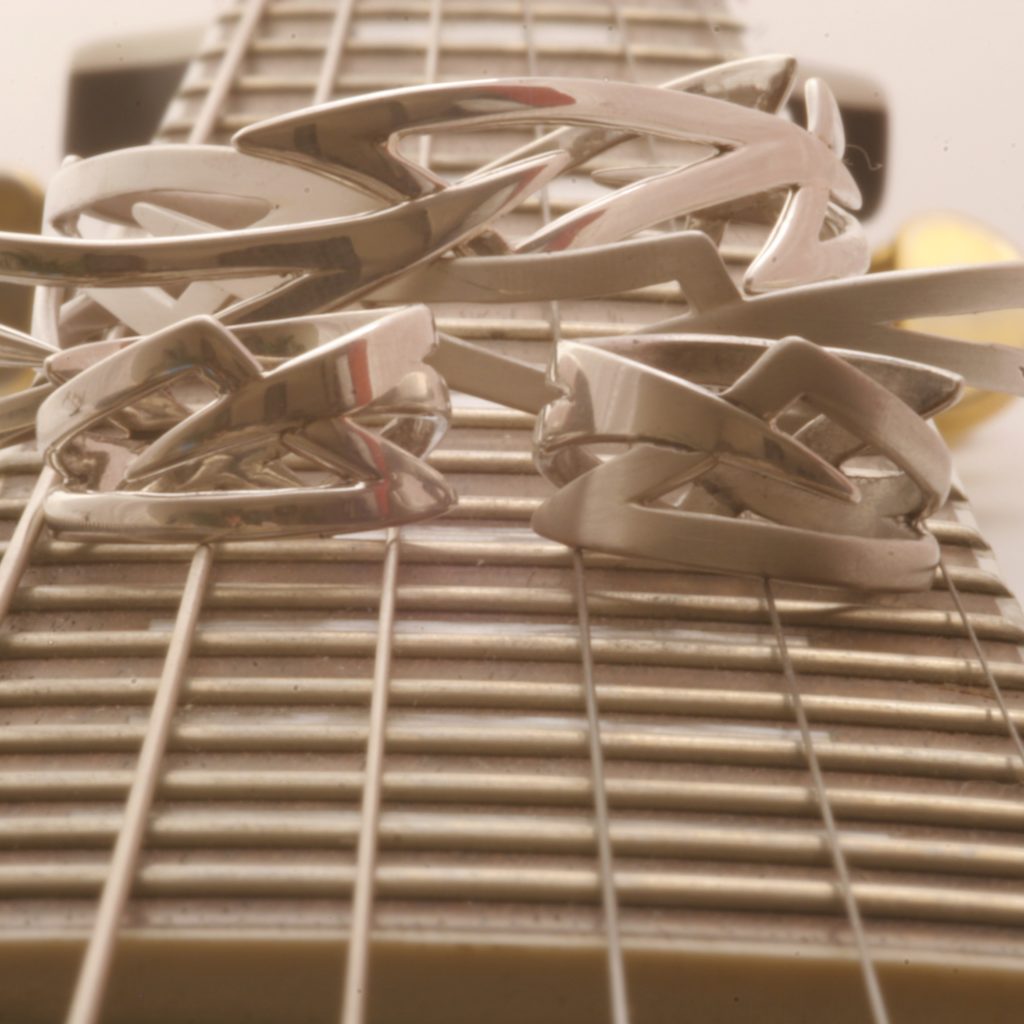
With a size 4 saw blade I cut out the required shapes from 1mm sterling silver sheet. I then used a pillar drill with a 0.5mm drill to create some holes, then with a size 6 saw blade I enlarged those holes to the shape I wanted for the detail. Using a set of doming punches & hammer I then proceeded to dome the shapes in opposite directions to create mirror images of each other.

Once the desired shapes were perfect, I hung them from hoops to ascertain the fall and slant needed to frame the face.

Next, I made the fixings.

The jump loops were created by tightly wrapping 1mm sterling silver round wire around a 2mm masonry nail to fashion a piece that resembles a spring. Using the saw, I then cut a straight line along the spring to release all the separate hoops.

After cutting a hoop in half I then soldered one half to the back of the leaf behind the lower leaf detail with hard solder. Before continuing I cooled and coated the solder joints on the earring with rouge paste to keep the solder in place then I soldered the other half to the top leaf detail. I then cooled, cleaned and attached the earring posts remembering to cover the earring solder joints with rouge paste.

Once satisfied with all the solder joints the clean-up begins. The first job is to remove all the solder spills, to do this I used a one-sided course swiss file. I then used a size 6 saw to clean up the inside of the jump loops to ensure the earring hoops fit through smoothly, finishing with the fine half round swiss file. Finally satisfied the surface is true the polishing can begin. Please refer to the polishing blog for the Monstera Pendant as I always use the same stages for a mirror finish.

Polishing

(The method I used to create the Monstera Pendant)

Tools and Materials Used

Number 4,6,8 saw blade, doming set and hammer, 1mm sterling silver sheet, 1mm & 2mm sterling silver round wire, heard silver solder, half round fine & one side course swiss file, emery papers 600,800,1000,1200, Tripoli polishing paste, Calico polishing mops Hard and Soft, Green Dialux, Muslin mop.

The sterling silver was first cut to create the leaf shape & then domed to create its three dimensional appearance. I then pierced & cut in the extra detail. The stalk and bail was then added. To give the piece a mirrored finish a selection of Swiss files in an array of grades & shapes was used to clear & level the surface of hammer dents & solder spills. Then a wet and dry fine paper was used.

Once you have a clean and level surface the process of polishing may begin. In between each stage of polishing the piece requires a thorough clean, i find an electric tooth brush does this job very nicely. Before starting each stage of polishing the piece needs to be completely dry.

Starting with 600 grade emery paper i thoroughly rubbed in between all the creases and between the leaf serrations, occasionally tearing off very small pieces of the emery paper to get into the intricate areas. For some of the finer detail I used a folded thin piece of paper clamped at one end to the bench & then threaded the piece onto the paper.

I repeated this process with increasingly finer grade emery paper until I got to grade 1200 which is the finest of the grades I needed. After completing the creases and detail I then cut a 1 cm strip of grade 8 emery paper and placed it in a split end shank of a Dremel 4000 and completed the final paper polish before moving on to paste and mops.

With a Dremel and a point felt mop, using Tripoli polishing compound I then moved on to the fine detailing.

To finish the piece a polishing motor with Tripoli and a firm calico mop was used, then with a softer Calico & green Dialux the final polish was almost complete. The last touch was a quick buff with a muslin mop to create the mirrored effect.

I would like to say that all the stages I used for this piece are not always necessary, for flat items I would not need to use a Dremel, but, for that extra clean mirror finish I would never bypass the polishing paper, through experience i have found the depth of shine provided by this stage is exceptional.

The finished item is then cast and ready to be personalised

Style Changer

Select Color Style